10 Ways to Use Old and Stale Bread [Zero Waste food]
A while ago, we bought a freezer. That's when we started buying bread on sale and freezing it. Last year, when we decided to finish everything in the freezer before we restocked it, we ended up with lots of bread, buns and tortillas. Some of them were freezer burnt. I couldn't throw them away, so I decided to research and see how to reuse the bread and avoid throwing it away.
Transform stale bread, tortillas and buns into delicious meals and dishes such as nachos, croutons, breadcrumbs, french onion soup, french toast, stuffing, strata, bread pudding, and crostini.
You probably already know how I feel about food waste composting but if you do not I invite you to take a look at my recipe for the “Homemade Food Veggie Scrap Broth”, “Organic Banana Plant Food” or learn about All the Tools You Need to Start Composting at Home. All the above will help you reduce food waste in your household.
Rehydrate the bread in the oven
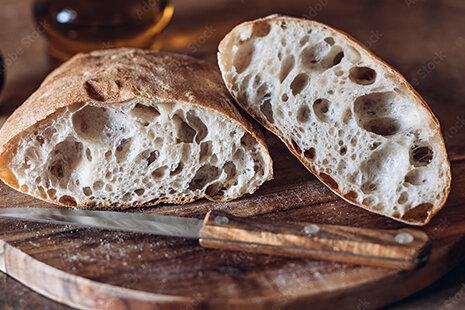
Suitable for loaves and french baguettes.
It is common for any bread to get hard after a while. Some bread gets hard to even after a few hours if left uncovered. If you have baguette or farmer's market bread that is not presliced, you can rehydrate your break and enjoy it again.
Here is how you rehydrate your loaf or half loaf:
Turn the oven to 300 degrees Fahrenheit (around 150 Celsius). This low temperature is allowing your bread to reabsorb moisture slowly without drying it.
Run your bread under cold water for about 30 seconds or until the bread's exterior is all soaked. Try not to get the loaf's interior too wet. It is ok if some water gets in there, but too much would turn it into mush.
Place the bread on a silicone baking mat and place it in the oven. The baking should take around 5-10 minutes. Check after 5 minutes to determine how much longer it needs to be baked.
In my experience, you can only rehydrate it once. Do not worry; even when the bread gets stale or hard, you can still reuse it for other recipes. Keep reading for more quick recipes.
Nachos
Suitable for corn tortillas and tortillas in general

Homemade nachos are one of my discoveries. One night I ran out of veggies for my hummus, and I was HUNGRY. I had some tortillas sitting around, and I thought that I could make that crunchy somehow.
Since then, I have used this recipe for freezer burnt tortillas and old tortillas that I sometimes forget about in my fridge's bottom drawer.
Here is how you transform old tortillas into crunchy nachos:
Cut the tortilla into triangles
Set the oven to 400 F (200 C )
Place the tortillas on a silicone sheet. Make sure they do not overlap. If they overlap, they will be soft in the overlapped sections.
Place the pan in the oven for five minutes. As soon as the tortilla gets a golden look, it is ready to take out of the oven
Let it sit for five minutes to cool down and enjoy.
Make croutons
Suitable for all kinds of bread, preferably one or two days old bread

Most of us dislike those first two and last two slices of bread of any type of sliced bread. Am I right?
Well, you don't have to eat them just as they are. Give them another life.
Croutons are my favourite way to enhance a good creme soup. I make squash creme soup all the time, and I couldn't imagine the dish without my homemade croutons.
Here is my recipe for croutons.
Dice the bread: Cut the bread into small cubes.
Mix the spices: In a bowl, create a mixture of two spoons of olive oil, one pinch of rosemary, one pinch of parsley, a bit of pepper, a bit of salt, a bit of garlic powder, and a bit of paprika. You can add whatever spices you enjoy. If you enjoy a spice more than another, add more of that.
Spread the bread on a silicon baking sheet and make sure it is not too crowded. If too crowded, it will sweat, and the croutons will be soft.
Bake at 400 F (200 C for my European folks) for 10 minutes or until crispy. I usually take mine out when 50% of them seem to get a golden colour.
Serve fresh or store them in a sealed container. I love fresh croutons with soups or salads. If you do not use them all, you can keep them in a tight container for up to 2 weeks.
Seasoned breadcrumbs
Suitable for all kinds of bread.
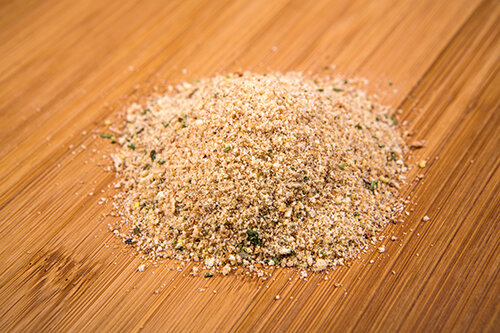
When I first made breadcrumbs at home, I mixed up whole grain, whitebread and ciabatta. It ended up being delicious, but I think I will use one type at a time for next time.
It is pretty straightforward to make breadcrumbs, but if you want to learn everything there is to know, check out this article from Healthy World Cuisine
Here is how I make my homemade breadcrumbs:
Collect the same type of bread.
Cut the bread into small pieces.
Bake the bread pieces in the oven at 350 F (175 C) for five minutes. Make sure the tray is not overcrowded. Let it bake till golden brown.
Let it cool for a few minutes.
Add the bread pieces to a blender until they look like crumbs.
Add oregano, basil and thyme.
Put it back in the oven for one minute and take it out to cool it down again
Use it then or store it in a tight container in the fridge for a month or in the freezer for two months.
French onion soup
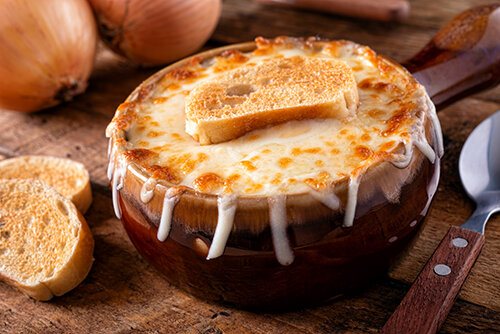
Funny story. My husband loves onion soup, and I hate it. Fun fact, Mark hates uncooked onions, tolerates cooked onions and loves onion soup. What an oddity!
I never bothered to learn how to make onion soup because Mark makes it himself. I only buy the onion soup mix for him from Bulk Barn from time to time.
I asked for his recipe and here is how he makes it.
Mix well 1/4 cup (40 g) of French onion soup from Bulk Barn with 1 litre of cold water
Bring to a boil.
Reduce heat and let it cook for 15-20 minutes while stirring occasionally.
When the soup is ready, add some spices such as paprika, pepper and salt
Add the soup to a ceramic bowl
Add slices of bread on top
Add cheese to your liking
Bake it in the oven at 400 F (200 C) for 10-15 minutes
Enjoy while hot
French Toast
Suitable for sliced bread
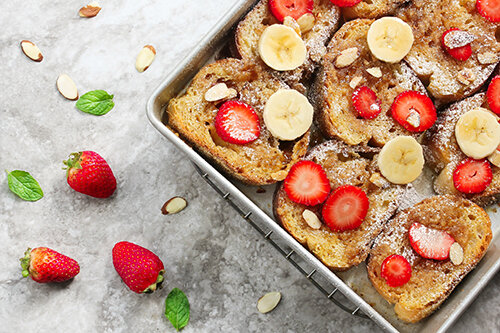
I love making french toast. When I was seven years old, I went on a field trip and my mom packed me two slices of french toast for lunch. I was very poor when I was young but my mom had this gift to make delicious food with minimum ingredients and that day we only had some hard bread, eggs, fat from our homegrown pig and some honey from our neighbour.
She made the most delicious french toast that all my friends wanted a piece of it. I ended up not having much lunch because I shared it with my colleagues.
Anyhow, here is my mom's recipe for french toast
Mix two eggs in a bowl with a pinch of salt and a few drops of vanilla or rum essence. If you drink milk, add two spoons of milk.
Slice bread and dip in the egg mixture
Place the dipped slices of bread on a silicone mat in a baking tray. You can spray the silicone mat with a thin coat of olive oil but it not necessary.
Place the tray in the oven to bake at 375 F (around 200 C) for 10 minutes
Turn the bread on the other side
Take out after 5 minutes
Enjoy with honey, maple syrup or berries
This recipe is super easy and because the toast is baked will avoid any smoke and burn. The french toast made in the oven can be dryer for some people's taste. If you would like softer french toast, add milk or some water to the egg mix.
Stuffing
Suitable for sourdough bread, french bread or another hearty bread.
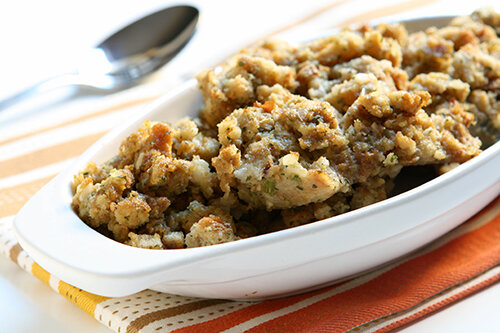
Another great recipe for old bread is stuffing. Last year I was debating on going vegan on Thanksgiving so I was looking up a vegan stuffing recipe and I found this delicious and simple recipe for vegan stuffing from Nora (noracooks.com)
I tried this recipe last year when I was debating on being vegan and it was delicious. My inlaws loved it too and they didn't even realize it was vegan.
Strata
Suitable for white, whole wheat, sourdough or gluten-free bread.
Strata is one of my favourite comfort foods. I do not make it often but when I do, it disappears really fast.
I recently tried this vegan strata recipe from holy cow vegan and it was TASTY. My husband loved it too.
It takes around 30-40 minutes to make but it can last a few days.
Vaishali from Holy Cow Vegan has the perfect recipe for delicious vegan strata.
Bread pudding

Suitable for any eggy bread, like challah or brioche, but any kind of bread will do.
I tested quite a few recipes for the bread pudding and I nailed down two of them. One recipe is for vegan people and one is for people who eat dairy and have no dietary restrictions.
Iosune from Simple Vegan Blog has the most delicious recipe I tried for vegan bread pudding. You can see the full recipe here.
This other recipe is the simplest and the quickest recipe for bread pudding.
Crostini or Bruschetta
Suitable for baguette

When I was a student back home in Bucharest I used to make crostini and bruschetta all the time. It was the easiest thing to do even with my stake baguette.
Think about crostini as mini toast and appetizer. Crostini can be sweet or savoury. It all depends on the toppings.
Gloria from Homemade and Yummy has a few suggestions for toppings.
If you are looking for vegan toppings for crostini, check out Lexi's and Beth's article.
Do you have any other suggestions for how we can use stale or old bread? Comment below with your ideas.

Hey, Claudia here
I am a senior graphic designer, a dog mom, an advocate for a zero-waste lifestyle, climate change, and sustainability. My articles are based on personal experience and well researched to give you the best source of information for all things zero-waste.